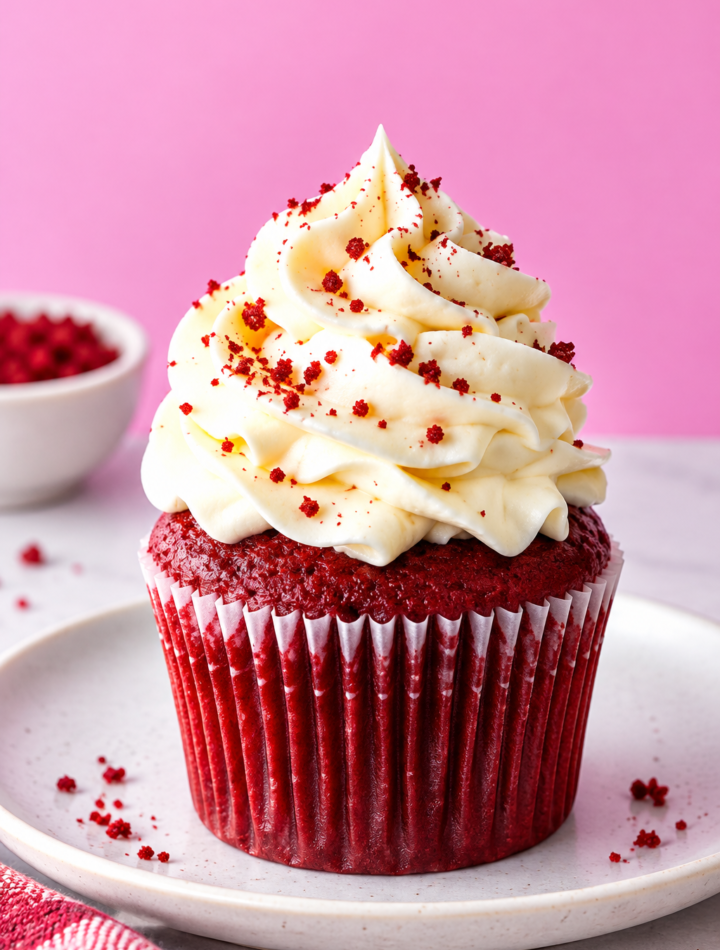
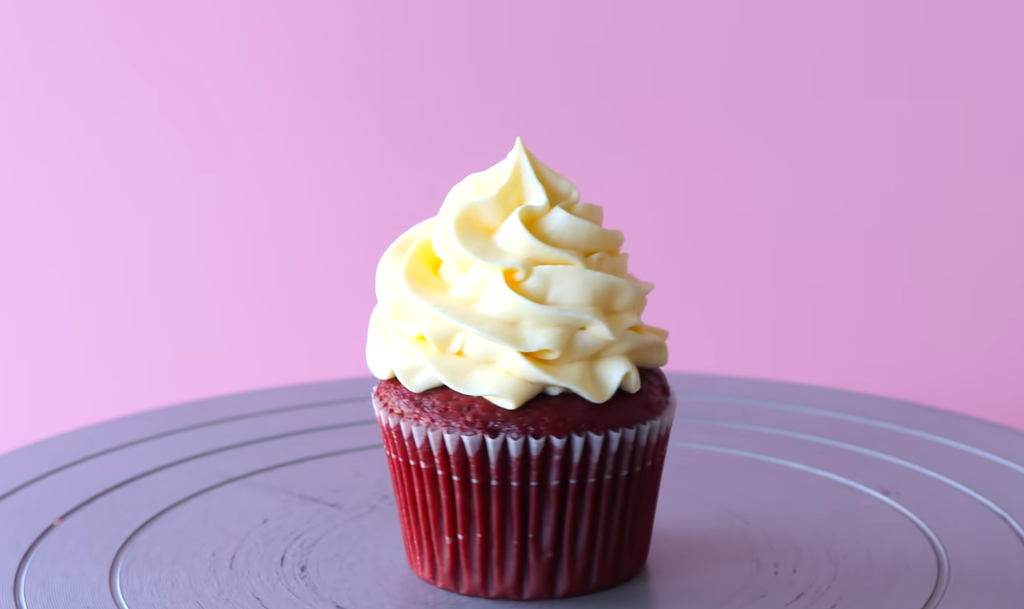
There is something special about a good Red Velvet Cupcakes Recipe. The cake should be soft without falling apart, moist without feeling heavy, and chocolatey enough to give you depth without turning into a regular chocolate cupcake. That balance is exactly what this recipe aims for.
The recipe provided in your image uses a straightforward combination of all-purpose flour, unsweetened cocoa powder, butter, sugar, eggs, buttermilk, vinegar, vanilla, and red food coloring. The small amount of cocoa gives the cupcakes their chocolate undertone, while buttermilk and vinegar help create the characteristic tender texture.
The recipe makes 10–12 cupcakes and uses an oven temperature of 180°C (350°F). The cupcakes bake for approximately 18–20 minutes.
One important note before publishing: the supplied recipe card says the cupcakes should be frosted, but it does not provide a frosting recipe or frosting quantities. To keep the article accurate, I have not invented a frosting formula and presented it as though it came from the image.
Red Velvet Cupcakes at a Glance
Recipe: Red Velvet Cupcakes
Prep Time: About 15–20 minutes
Bake Time: 18–20 minutes
Total Time: About 35–40 minutes, plus cooling and frosting
Yield: 10–12 cupcakes
Oven Temperature: 180°C / 350°F
Course: Dessert
Cuisine: American-inspired
Best For: Birthdays, parties, holidays, Valentine’s Day, afternoon treats
Why You’ll Love This Red Velvet Cupcakes Recipe
These cupcakes are built around texture rather than an overloaded ingredient list.
The flour provides structure, while softened butter gives the batter richness. Granulated sugar contributes sweetness and helps keep the crumb tender. Cocoa powder adds a mild chocolate note instead of dominating the flavor.
Then comes the buttermilk.
Buttermilk brings a pleasant tang and works beautifully with the baking soda and vinegar. The result is a cupcake that feels lighter and more delicate than one made with a heavier chocolate batter.
The red food coloring gives the cupcakes their recognizable appearance, while vanilla rounds out the flavor.
There is also an important technique hidden in the recipe: don’t overmix the batter. Once the dry ingredients meet the wet mixture, the goal is simply to bring everything together. Excessive mixing can make cupcakes tighter and less tender.
Ingredients for Red Velvet Cupcakes
The following measurements are taken from the supplied recipe image.
Dry Ingredients
- 1½ cups all-purpose flour
- 1 tablespoon unsweetened cocoa powder
- 1 teaspoon baking powder
- ½ teaspoon baking soda
- ¼ teaspoon salt
Wet Ingredients
- ½ cup unsalted butter, softened (115g)
- ¾ cup granulated sugar (150g)
- 2 large eggs
- ½ cup buttermilk (120ml)
- 1–2 teaspoons red food coloring
- 1 teaspoon vanilla extract
- 1 teaspoon white vinegar
Yield
This recipe makes approximately 10–12 cupcakes.
How to Make Red Velvet Cupcakes
1. Prepare the Cupcake Pan
Preheat your oven to 180°C (350°F).
Line a cupcake pan with paper liners.
Don’t skip the preheating stage. Cupcake batter needs to enter a properly heated oven so the leavening agents can begin working at the intended stage of baking.
If the oven is still coming up to temperature when the pan goes in, the cupcakes may not rise as expected.
2. Mix the Dry Ingredients
Add the all-purpose flour, cocoa powder, baking powder, baking soda, and salt to a bowl.
Whisk them together thoroughly.
This step distributes the cocoa and leavening agents through the flour before they meet the wet ingredients.
Because the recipe uses only a small amount of cocoa powder, you don’t want pockets of cocoa or baking soda concentrated in individual cupcakes.
3. Cream the Butter and Sugar
Place the softened butter and granulated sugar into a large mixing bowl.
Beat them together for approximately 2–3 minutes, until the mixture becomes light and fluffy.
This is one of the steps where patience matters.
The butter should be soft enough to beat smoothly, but it shouldn’t be melted.
If the butter is too cold, the mixture can remain dense and uneven.
If it’s melted, you won’t get the same creaming effect.
What should it look like?
The mixture should appear lighter and fluffier than when you started.
You don’t need to beat it indefinitely. Once the texture has changed noticeably, move on to the eggs.
4. Add the Eggs
Add the eggs one at a time, beating well after each addition.
Adding them gradually helps maintain a smoother batter.
Scrape down the sides of the bowl if necessary.
If the mixture looks slightly curdled at this stage, don’t panic. The important thing is to continue following the recipe and avoid adding the dry ingredients before you’re ready.
5. Add Vanilla and Red Food Coloring
Add the vanilla extract and 1–2 teaspoons of red food coloring.
The exact amount of food coloring can depend on the product you’re using.
The recipe card specifically notes that gel food coloring can produce a vibrant red shade. If you’re using a different type of coloring, you may need to adjust the amount according to the manufacturer’s concentration.
The color should be evenly distributed through the butter mixture.
6. Combine the Buttermilk and Vinegar
In a separate bowl, mix together the buttermilk and white vinegar.
The mixture may appear slightly curdled.
That’s not necessarily a problem.
Buttermilk is already acidic, and adding vinegar increases the acidity of the mixture. In this recipe, that acidity works alongside the baking soda and contributes to the cupcake’s characteristic texture.
7. Add the Dry and Wet Mixtures
Now comes one of the most important stages.
Add the dry ingredients to the wet mixture in three portions, alternating with the buttermilk mixture.
Begin and finish with the dry ingredients.
Mix gently after each addition.
The goal is to create a smooth batter without beating it excessively.
Don’t chase a perfectly beaten batter
Once there are no obvious streaks of dry flour, stop mixing.
Overmixing can develop too much gluten, which can leave the cupcakes with a firmer, chewier texture.
For soft red velvet cupcakes, gentle mixing is the better approach.
8. Fill the Cupcake Liners
Divide the batter between the prepared cupcake liners.
The supplied recipe recommends filling each liner approximately ¾ full.
Try to distribute the batter evenly.
If you have a kitchen scoop, it can make this much easier and help all the cupcakes finish baking around the same time.
Avoid filling some liners nearly to the top while leaving others half empty. Uneven portions lead to uneven baking.
9. Bake the Cupcakes
Place the tray in the preheated 180°C (350°F) oven.
Bake for approximately 18–20 minutes.
Start checking toward the lower end of the baking range because oven performance varies.
The recipe card suggests testing the center with a toothpick.
Insert it into the center of one cupcake.
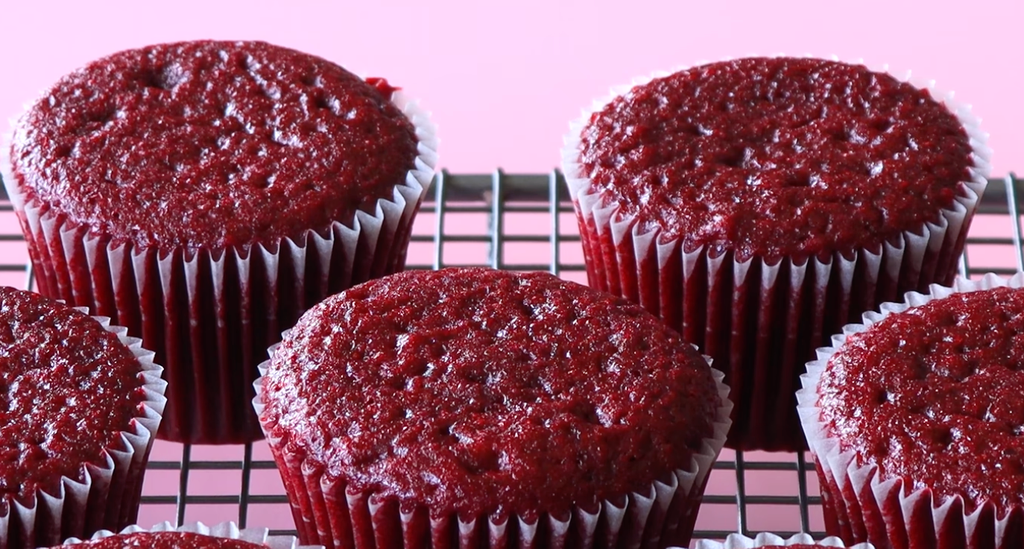
If it comes out clean or with only a few moist crumbs, the cupcakes are ready.
If wet batter clings to the toothpick, give them a little more time.
10. Cool Before Frosting
Once baked, allow the cupcakes to cool in the pan for approximately 5 minutes.
Then transfer them to a wire rack and let them cool completely.
This is not the moment to rush.
Frosting a warm cupcake can cause the topping to soften, slide, or melt.
The supplied recipe card says to let the cupcakes cool completely before frosting, and that’s especially important if you’re using a soft frosting.
Frosting note
The provided image does not specify the type, ingredients, or quantities of frosting.
For the finished cupcakes, use your preferred red velvet frosting. Cream cheese frosting is a classic pairing, but the exact frosting formula should be separately tested and documented before publishing it as part of this recipe.
Important Pointers for Better Red Velvet Cupcakes
Use softened butter, not melted butter
The recipe specifically calls for softened butter.
Softened butter blends with sugar properly during the creaming stage. Melted butter changes the structure of the batter and can produce a different texture.
Measure flour carefully
Too much flour can turn a soft cupcake into a dry one.
If possible, weigh the flour using a kitchen scale.
The recipe specifies 1½ cups (approximately 180g depending on measuring convention), so if you’re publishing the recipe card, keep the volume and gram measurement consistent with the flour measurement system you actually test.
Don’t skip the cocoa
Only one tablespoon of cocoa powder is used.
That may seem small compared with a chocolate cupcake, but that’s intentional.
The recipe isn’t trying to become a full chocolate cupcake. The cocoa contributes a subtle chocolate character while allowing the vanilla, buttermilk, butter, and red color to remain noticeable.
Use good-quality food coloring
The final shade depends heavily on the coloring.
The image specifically recommends gel food coloring for a vibrant red appearance.
Liquid coloring can behave differently depending on concentration, so don’t automatically substitute equal amounts without considering the product you’re using.
Cooking Mistakes to Avoid
1. Overmixing the batter
This is probably the easiest mistake to make.
Once the flour has been incorporated, stop mixing.
A few gentle strokes are better than several minutes of beating.
2. Using cold butter
Cold butter won’t cream efficiently with the sugar.
The result can be a heavy mixture with uneven pockets of butter.
Allow the butter to soften naturally before beginning.
Don’t microwave it until melted.
3. Overbaking
Red velvet cupcakes should remain moist.
The recipe calls for 18–20 minutes, but don’t rely on the clock alone.
Check with a toothpick.
Once the center is baked and the toothpick comes out clean or with a few crumbs, remove the cupcakes.
Leaving them in the oven several minutes longer can dry out the edges and center.
4. Filling the liners too much
The recipe recommends filling the liners around three-quarters full.
More batter doesn’t mean better cupcakes.
Overfilled liners can cause the batter to rise excessively, spill over the edges, and create uneven shapes.
5. Opening the oven repeatedly
Try not to open the oven door repeatedly during the early part of baking.
Every opening changes the temperature inside the oven.
If you’re checking the cupcakes, wait until you’re reasonably close to the expected baking time.
6. Frosting warm cupcakes
This can ruin an otherwise successful batch.
Wait until the cupcakes are completely cool.
If necessary, let them cool longer than you originally planned.
7. Using too much food coloring
More coloring doesn’t automatically mean a better red.
The image recommends 1–2 teaspoons, with a note that gel coloring can provide a vibrant result.
Start according to the product’s concentration and adjust carefully.
How to Get Soft Red Velvet Cupcakes
Texture comes down to several small decisions rather than one secret ingredient.
First, cream the butter and sugar properly.
Second, avoid adding excessive flour.
Third, use the buttermilk mixture as directed.
Fourth, don’t overmix once the flour has been incorporated.
Finally, don’t overbake.
Those five details have more impact on the finished crumb than adding unnecessary ingredients.
The cupcake should feel tender when you bite into it, with enough structure to hold frosting without collapsing.
Why Buttermilk Matters
Buttermilk is one of the ingredients that gives this recipe its personality.
It contributes acidity, moisture, and a gentle tang.
Combined with baking soda and vinegar, it supports the chemistry that helps the batter rise.
It also works well with the small amount of cocoa powder.
Without the buttermilk element, the flavor and texture would be noticeably different.
That’s why I wouldn’t treat it as an ingredient to casually replace with plain milk if you’re trying to reproduce the supplied recipe.
How to Get a Stronger Red Color
The supplied image gives several useful color tips.
Use gel food coloring
Gel coloring is concentrated and can create a strong shade without requiring a large amount of liquid.
Don’t expect cocoa-free red velvet
This recipe contains cocoa powder, so the natural batter has a brownish undertone before coloring.
The red coloring needs to overcome that darker base.
Don’t add excessive coloring
Too much food coloring can affect the flavor and isn’t necessary when you’re using a concentrated product.
Storage Instructions
The recipe card recommends storing the cupcakes in an airtight container in the refrigerator for up to 3 days.
That’s particularly relevant once the cupcakes have been frosted.
Keep them covered so they don’t absorb refrigerator odors or lose moisture.
Before serving, allow them to sit at room temperature for a short period if the frosting becomes firm when chilled.
Make-Ahead Tips
If you’re preparing these cupcakes for a birthday or gathering, you don’t necessarily need to do everything at once.
Bake the cupcakes ahead of time and allow them to cool completely.
Store them properly.
Then frost closer to serving time.
This approach also makes decorating easier because completely cooled cupcakes are less likely to disturb the frosting.
For a party, bake the cupcakes the day before and decorate them on the day they’re needed.
Red Velvet Cupcakes for Different Occasions
These cupcakes aren’t limited to birthdays.
Valentine’s Day
The red color naturally suits Valentine’s Day. Add simple heart-shaped decorations or red sprinkles.
Christmas
Red velvet works beautifully on a Christmas dessert table. Pair the red cupcakes with white frosting and restrained festive decorations.
Birthdays
Make a batch of 10–12 cupcakes and decorate them individually instead of cutting a cake.
Afternoon Dessert
A single cupcake with coffee or tea makes an easy afternoon treat.
Bake Sale
The individual portions make these cupcakes convenient for packaging and serving.
Frequently Asked Questions
What makes red velvet different from chocolate cupcakes?
Red velvet generally uses a much smaller amount of cocoa than a chocolate cupcake. This recipe contains just 1 tablespoon of unsweetened cocoa powder, allowing the chocolate flavor to remain subtle.
Why add vinegar to red velvet cupcakes?
The supplied recipe combines white vinegar with buttermilk. The acidity works with the baking soda and contributes to the batter’s overall chemistry and texture.
Can I use liquid food coloring?
You can, but the recipe image specifically recommends gel food coloring for a vibrant red shade. Different food colorings have different concentrations, so the amount may need adjustment.
Why are my cupcakes dry?
The most likely issues are overbaking, using too much flour, or overmixing the batter.
Start checking the cupcakes around the recommended baking time and remove them when a toothpick comes out clean or with a few moist crumbs.
Why did my cupcakes sink?
Possible causes include underbaking, excessive mixing, inaccurate leavening measurements, or opening the oven too early.
Make sure the oven is properly preheated and bake until the centers are set.
Can I frost the cupcakes while warm?
No.
Allow them to cool completely first. Warm cupcakes can soften or melt frosting and make decorating difficult.
How many cupcakes does this recipe make?
The supplied recipe makes 10–12 cupcakes.
Red Velvet Cupcakes Recipe – Short Version
Ingredients
- 1½ cups all-purpose flour
- 1 tablespoon unsweetened cocoa powder
- 1 teaspoon baking powder
- ½ teaspoon baking soda
- ¼ teaspoon salt
- ½ cup softened unsalted butter
- ¾ cup granulated sugar
- 2 large eggs
- ½ cup buttermilk
- 1–2 teaspoons red food coloring
- 1 teaspoon vanilla extract
- 1 teaspoon white vinegar
Directions
- Preheat oven to 180°C (350°F) and line a cupcake pan.
- Whisk flour, cocoa, baking powder, baking soda, and salt.
- Beat softened butter and sugar for 2–3 minutes until light and fluffy.
- Add eggs one at a time, beating after each.
- Add vanilla and red food coloring.
- Mix buttermilk and vinegar separately.
- Add dry ingredients and buttermilk mixture alternately in three additions.
- Mix gently until just combined.
- Fill cupcake liners about ¾ full.
- Bake for 18–20 minutes.
- Cool in the pan for 5 minutes.
- Transfer to a wire rack and cool completely.
- Frost with your preferred frosting.